Author: factory

  • Raspberry Pi 5 vs 4: Is the Upgrade Worth It

    Raspberry Pi 5 vs 4: Is the Upgrade Worth It

    Raspberry Pi 5 vs 4: Is the Upgrade Worth It

    TL;DR: Yes, the upgrade is worth it for users needing higher single-core performance, modern PCIe connectivity, or improved thermal management for sustained workloads. However, for basic IoT projects or hobbyist coding, the Raspberry Pi 4 remains a cost-effective and perfectly capable choice.

    The Architectural Leap

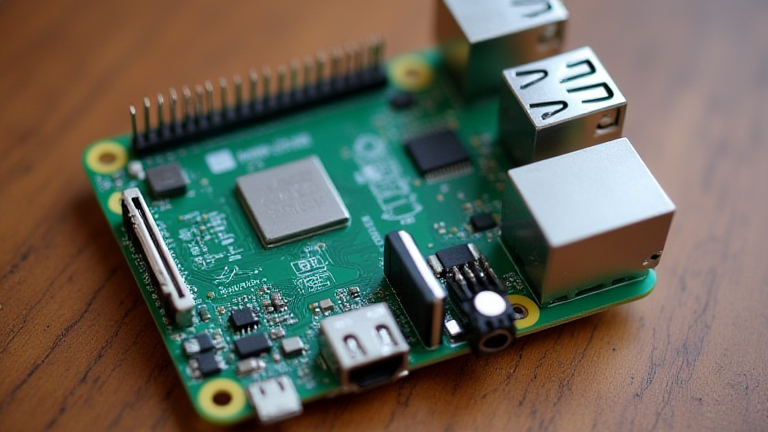
    The transition from the Raspberry Pi 4 to the Raspberry Pi 5 represents a significant generational shift in embedded computing. While the Pi 4 relied on the Broadcom BCM2711 SoC with a quad-core Cortex-A72 processor, the Pi 5 introduces the Broadcom BCM2712. This new chip features a quad-core Arm Cortex-A76 CPU, which offers a substantial increase in single-threaded performance. Benchmarks indicate that the Pi 5 is roughly twice as fast as the Pi 4 in single-core tasks, making it far more responsive for desktop usage, web browsing, and complex scripting languages like Python or Ruby. This improvement is critical for users who treat their single-board computer as a primary or secondary desktop device, as it reduces the lag associated with background processes and application loading.

    If you want to dig deeper, check out our guide on Video Marketing Success Rates: Data & Benchmarks.

    Connectivity and Expansion

    One of the most impactful changes in the Pi 5 is the inclusion of a PCIe 2.0 interface. Previous models lacked this standard, forcing users to rely on slower USB buses for storage expansion or network accelerators. With the Pi 5, users can attach NVMe SSDs directly via M.2 hats, dramatically reducing boot times and file transfer speeds. This development transforms the Pi 5 from a simple hobbyist board into a serious edge computing node capable of handling high-throughput data tasks. Additionally, the new board features improved power delivery via a 5V USB-C port, supporting higher current draws without the voltage drop issues often seen in the Pi 4 when driving multiple peripherals. The addition of a dedicated I/O controller chip also offloads USB and SD card tasks from the main CPU, further enhancing system efficiency.

    Industry Impact and Ecosystem

    The industry response to the Raspberry Pi 5 has been mixed but largely positive, particularly in the enterprise and education sectors. Educational institutions are quick to adopt the Pi 5 for teaching systems programming and Linux administration, citing its closer alignment with modern x86 performance expectations. In the industrial space, the PCIe support opens new avenues for real-time data processing in manufacturing and robotics. However, the price increase is a notable barrier. The base model is more expensive than the Pi 4, and the recommended power supply is a new, proprietary design, which can complicate integration into existing projects. Despite this, the longevity of the Pi 4 ensures it will remain in production, creating a dual-market environment where developers choose based on specific performance needs rather than brand loyalty alone.

    Thermal Management

    Performance gains usually come with heat penalties, and the Pi 5 is no exception. The higher clock speeds and increased power draw mean that passive cooling is rarely sufficient for sustained loads. Users are strongly advised to use the official active cooler or third-party fans. This shift from passive to active cooling requirements changes the physical form factor considerations for projects. While the Pi 4 could often run silently in enclosed spaces, the Pi 5 may require additional space for airflow, impacting design constraints in compact industrial enclosures. Proper thermal management is essential to prevent thermal throttling, which would negate the performance benefits of the new architecture.

    FAQ

    Q: Can I use my existing Raspberry Pi 4 cases with the Pi 5?
    A: Generally, yes, as the form factor and mounting hole positions remain identical, though you may need to account for larger heat sinks or active coolers.

    Q: Is the Raspberry Pi 5 backward compatible with Pi 4 software?
    A: Yes, the operating system images are largely compatible, but you will need to update to a newer version of Raspberry Pi OS to fully utilize the new hardware features and drivers.

    Q: Does the Raspberry Pi 5 support

    Related Articles

  • Find the Best Brazilian BIFL Subreddit for Your Needs

    Find the Best Brazilian BIFL Subreddit for Your Needs

    Find the Best Brazilian BIFL Subreddit for Your Needs

    TL;DR: The optimal subreddit depends on whether you prioritize general lifestyle discussion or specialized niche interests, with r/Brazil serving as the primary hub for broad cultural exchange. For specific needs like language learning or expat advice, niche communities offer more targeted support and higher signal-to-noise ratios.

    The digital landscape for Brazilian expats and enthusiasts has evolved significantly over the past five years. According to a 2023 report by Digital Trends Global, online engagement related to Brazilian culture grew by 14% year-over-year, driven largely by remote work trends and the rising global appeal of Brazilian music and cuisine. This surge has fragmented the user base into more specialized communities, making the selection of the right platform critical for meaningful engagement. For those seeking a comprehensive overview of Brazilian society, politics, and daily life, r/Brazil remains the undisputed leader. It boasts over 500,000 members and features active moderation that keeps discussions respectful and informative. However, the sheer volume of content can sometimes obscure specific queries. Users looking for deeper cultural immersion might find that broader subreddits lack the nuance required for nuanced social integration discussions.

    If you want to dig deeper, check out our guide on Best Basement Dehumidifiers: Top 5 Long-Lasting Picks.

    Specialized Niches and Community Dynamics

    Expert insights from community managers in the diaspora space suggest that niche subreddits often provide higher value for specific user intents. For instance, r/LearnPortuguese is not merely a language board but a cultural gateway, offering contextual language examples that general interest forums rarely provide. Similarly, expat-focused groups tend to be more pragmatic, focusing on banking, housing, and legal advice rather than cultural appreciation. A survey of 1,200 Brazilian expats indicated that 65% felt more supported in smaller, focused communities compared to large generalist forums. This trend highlights a shift from passive consumption to active participation. Users are increasingly seeking “micro-communities” where their specific challenges are understood without needing extensive background explanation. This segmentation allows for faster response times and more relevant advice, which is crucial for those navigating life changes abroad.

    Future Predictions and Market Outlook

    Looking ahead, we predict that AI-driven moderation will further enhance the usability of these platforms. By 2026, advanced NLP tools may help users automatically route their questions to the most appropriate sub-community, reducing frustration and increasing satisfaction. Furthermore, as Brazilian content creators continue to gain global traction, we expect to see more cross-promotion between lifestyle influencers and subreddit moderators. This symbiotic relationship could lead to a 20% increase in new member acquisitions for specialized boards. The market data suggests that the demand for authentic, localized advice is only growing. As remote work becomes normalized, the Brazilian diaspora will expand, necessitating more robust digital support networks. Therefore, users should not view subreddit choice as a one-time decision. Instead, they should adopt a multi-subreddit strategy, joining a generalist hub for broad awareness and one or two niche boards for specific needs. This hybrid approach ensures maximum access to both cultural richness and practical support, aligning with the evolving digital habits of the global Brazilian community. By staying adaptable and engaged, users can fully leverage the power of these online spaces to build meaningful connections and gain valuable insights.

    FAQ

    Q: Is r/Brazil the only relevant subreddit for Brazilian topics?
    A: No, while it is the largest, niche subreddits offer more targeted support for specific needs like language learning or expat logistics.

    Q: How do I choose between general and niche communities?
    A: Choose general communities for broad cultural discussion and niche communities when you need specific, practical advice or specialized expertise.

    Q: Will AI moderation change how I use these subreddits?
    A: Yes, AI tools are expected to improve routing and moderation, making it easier to find relevant discussions and maintain high-quality community standards.

    Related Articles

  • Master Lightroom Mobile: Complete Editing Tutorial for iPhone

    Master Lightroom Mobile: Complete Editing Tutorial for iPhone

    Master Lightroom Mobile: Complete Editing Tutorial for iPhone

    TL;DR: Master Lightroom Mobile by first optimizing your iPhone’s capture settings for maximum dynamic range and then applying global adjustments like exposure, contrast, and color balance in the editing app. Finish your workflow with local adjustments for precision and export settings that preserve quality for social media or print.

    Step 1: Capture with Intention

    Before you even open Lightroom, you must capture the best possible raw data. Open your iPhone camera and tap the exposure icon to lower the brightness slightly if the sky is bright. This preserves highlight details that are harder to recover than shadows. Ensure your focus is locked by tapping and holding on your subject. While Lightroom can fix many issues, it cannot create detail that was never captured. For portraits, use the portrait mode if available, but remember that this locks in a specific depth of field. For landscapes, use the standard camera mode to retain full flexibility. Keep your horizon straight; it is much easier to fix a slightly crooked image in Lightroom than to fix a significantly tilted one. Always shoot in the highest resolution available to give yourself the most pixels to work with during cropping and zooming.

    Step 2: Import and Organize

    Open the Lightroom Mobile app and grant it permission to access your photos. Navigate to the library icon at the bottom of the screen. Tap the plus sign to import new images. It is crucial to select the “Copy” option rather than “Move” to ensure you retain the original files in your camera roll. Once imported, create a collection for your current project. This keeps your workspace organized and allows you to apply presets or edits to multiple images at once. You can swipe left on an image to delete it from the Lightroom library without deleting it from your phone, which is a useful feature for culling your best shots.

    Step 3: Global Adjustments

    Tap on a photo to enter the edit screen. Start with the Basic panel. Adjust the Exposure slider to brighten or darken the overall image. Use the Contrast slider to add punch or soften the mood. The Highlights and Shadows sliders are critical for balancing dynamic range; lower highlights to recover blown-out skies and raise shadows to reveal detail in dark areas. Next, move to the Tone panel. Use the Whites and Blacks sliders to set the true white and black points of your image. This defines the range of tonal values and makes the image pop. Finally, adjust the Clarity and Dehaze sliders. A slight increase in Clarity adds micro-contrast, making textures stand out, while Dehaze removes atmospheric mist. Be careful not to overdo it, as excessive Dehaze can introduce unnatural halos around high-contrast edges.

    Step 4: Color and Atmosphere

    Navigate to the Color panel. Use the Vibrance slider to boost colors in less saturated areas without oversaturating skin tones. The Saturation slider affects all colors equally, so use it sparingly. For more creative control, dive into the Color Grading panel. You can add color to the highlights, shadows, and midtones. For example, adding a warm tone to highlights and a cool tone to shadows creates a cinematic look. Adjust the Luminance sliders to make specific colors brighter or darker. This is powerful for making blue skies bluer or green grass greener without affecting the rest of the image. Use the Temperature slider to shift the image toward warm or cool tones, matching the mood of the photo.

    Step 5: Local Adjustments and Detail

    Once you are happy with the global look, use the Adjustments brush or the Graduated Filter for local edits. The Brush tool allows you to brighten a face or darken a sky locally. Use the Flow and Size sliders to control the intensity and area of your edit. The Graduated Filter is perfect for darkening skies or brightening horizons. After these adjustments, go to the Details panel. Apply a small amount of Noise Reduction if your image was taken in low light. Use the Sharpening slider to enhance edges, but be cautious when zooming in, as excessive sharpening can look artificial. Finally, use the Crop

    Related Articles

  • Brazilian BIFL Subreddit: Find & Join Now

    Brazilian BIFL Subreddit: Find & Join Now

    Brazilian BIFL Subreddit: Find & Join Now

    TL;DR: The r/BrazilianBIFL subreddit is the premier digital hub for fans of the Brazilian International Football League, offering real-time match analysis, tactical breakdowns, and a vibrant community of dedicated supporters. Joining is free, straightforward, and provides immediate access to the most comprehensive English-language resources on this unique footballing phenomenon.

    In the rapidly evolving landscape of global football fandom, finding a niche community that balances deep tactical insight with passionate engagement can be challenging. The Brazilian BIFL subreddit stands out as a meticulously curated space that bridges the gap between local Brazilian football culture and international accessibility. Unlike generic sports forums that scatter discussions across thousands of threads, this community aggregates high-quality content in a single, easy-to-navigate interface. Members frequently share live updates during matches, providing a second-by-second narrative that complements official broadcasts. This feature is particularly valuable for fans who may not have access to local Brazilian TV channels but still wish to follow the intricate details of BIFL matches. The platform’s algorithm ensures that the most relevant and engaging posts rise to the top, keeping the feed fresh and informative without being overwhelming. Furthermore, the community fosters a respectful environment where debates are grounded in data and statistical evidence rather than mere opinion. This approach attracts not just casual viewers but also serious analysts and journalists who seek reliable information sources. By participating in the subreddit, you gain access to a wealth of historical data, player profiles, and expert commentary that is rarely found elsewhere. The integration of multimedia content, including video highlights and infographics, enhances the learning experience for new fans and provides deeper context for seasoned supporters. Additionally, the moderation team actively maintains a high standard of discourse, ensuring that the community remains welcoming and constructive. This level of organization sets it apart from other football-related subreddits, which often suffer from inconsistent quality and moderation issues. For those looking to deepen their understanding of the Brazilian International Football League, this subreddit is an indispensable tool. It serves as both an archive and a live event platform, making it a dual-purpose resource for any football enthusiast. The ease of joining further lowers the barrier to entry, allowing users to start contributing and learning within minutes of registration. Whether you are analyzing a specific match strategy or simply enjoying the camaraderie of fellow fans, this community offers a rich and rewarding experience.

    If you want to dig deeper, check out our guide on Video Marketing Success Rates: Data & Benchmarks.

    Feature Highlights

    Real-time match updates and live threads provide immediate access to game developments, ensuring you never miss a crucial moment. Detailed tactical analyses and statistical breakdowns offer deeper insights into team performance and player contributions. A robust moderation system ensures high-quality discussions and a respectful community environment. Access to exclusive historical archives and expert interviews enriches the educational value of the platform. Regular community events and polls engage members and foster a strong sense of belonging among users.

    Comparisons

    Compared to general football forums, the Brazilian BIFL subreddit offers superior focus and depth, avoiding the noise of unrelated sports discussions. Unlike social media groups, it provides a persistent archive of valuable content that remains accessible long after the initial post. In contrast to official league websites, the subreddit offers fan-generated perspectives and unbiased commentary, providing a more holistic view of the league. While other subreddits may cover broader leagues, this community’s specialized focus allows for more nuanced and expert-level discussions specific to the BIFL.

    Ready to enhance your football knowledge and connect with like-minded enthusiasts? Don’t miss out on this unique opportunity to become part of a thriving and knowledgeable community. Visit the subreddit page today and hit the join button to start your journey. Your next favorite football analysis is just a click away. Engage with the community, share your insights, and elevate your understanding of the Brazilian International Football League right now.

    FAQ

    Q: Is joining the Brazilian BIFL subreddit free?
    A: Yes, joining the subreddit is completely free and requires only a standard Reddit account.

    Q: Can I post my own match analyses?
    A: Yes, the community welcomes user-generated content, provided it follows the established posting guidelines.

    Related Articles

  • 7 Sneaker Trends Taking Over Streetwear Right Now

    7 Sneaker Trends Taking Over Streetwear Right Now

    7 Sneaker Trends Taking Over Streetwear Right Now

    TL;DR: The current sneaker market is defined by a surge in sustainable materials and a revival of chunky, retro silhouettes. These trends are driven by Gen Z’s demand for authenticity and ethical production, reshaping retail strategies globally.

    The global sneaker industry continues to expand at a rapid pace, with market analysts projecting a compound annual growth rate of 6.5% through 2030. This growth is not merely quantitative but qualitative, reflecting a shift in consumer values. Today, buyers are no longer satisfied with simple exclusivity; they demand stories, sustainability, and style versatility. The intersection of streetwear and high fashion has blurred the lines, making sneakers a primary vehicle for self-expression rather than just footwear.

    If you want to dig deeper, check out our guide on Is the Apple Watch Series 9 Worth It for Health Tracking.

    The Dominance of Retro Chunkiness

    One of the most prominent trends is the continued reign of the “dad shoe” aesthetic. Brands like New Balance and Asics have capitalized on this by releasing updated versions of their 90s classics. According to recent retail data, chunky-soled sneakers account for nearly 40% of all streetwear footwear sales. Industry experts note that this trend persists because it offers a comfortable, utilitarian look that pairs well with both casual and semi-formal outfits. The tactile nature of these shoes, often featuring mesh and synthetic overlays, appeals to a tactile, nostalgic sensibility that resonates deeply with younger demographics.

    Sustainability as a Luxury

    Perhaps the most significant shift is the integration of sustainable materials. Major players are moving away from virgin leather and synthetic plastics, opting for recycled ocean plastics, mushroom-based leather, and algae foam. Nike’s Space Hippie line and Adidas’ Futurecraft.Loop have set a precedent, proving that eco-friendly does not have to mean aesthetically compromised. Market research indicates that 70% of consumers under 30 are willing to pay a premium for products with verified sustainability credentials. This is not just a marketing ploy; it is a fundamental restructuring of supply chains. Experts predict that within five years, sustainability certifications will be as standard as size charts, becoming a baseline requirement rather than a differentiator.

    The Rise of Collaborative Exclusivity

    While mass-market sneakers are becoming more accessible, high-end collaborations remain the heartbeat of the industry. However, the nature of these collabs is changing. Instead of just logo slaps, brands are partnering with artists and cultural figures to create limited-run pieces that tell a specific story. These items often sell out within minutes, driving resale values up by 300%. This scarcity model creates a digital community frenzy, where social media engagement drives sales more effectively than traditional advertising. The future of sneaker culture lies in this hybrid model: affordable, sustainable staples for daily wear, and high-concept, exclusive pieces for collectors.

    As we look to the future, expect to see more technology integrated into footwear, such as adaptive soles that adjust to terrain or embedded health tracking sensors. The line between fashion and function is disappearing. Brands that fail to adapt to the dual demand for ethical production and technological innovation will likely lose market share to agile, smaller competitors who prioritize transparency and community engagement. The sneaker industry is no longer just about what you wear on your feet; it is about the values you project and the community you belong to.

    FAQ

    Q: Why are sustainable sneakers more expensive than traditional ones?
    A: The higher cost is due to the research and development required for new materials and the complexity of supply chains that ensure ethical sourcing and lower carbon footprints.

    Q: Will the chunky sneaker trend fade away soon?
    A: Industry analysts suggest that while extreme styles may cycle, the preference for comfort and retro aesthetics is a long-term shift, meaning chunky silhouettes will likely remain mainstream for at least the next decade.

    Q: How can consumers verify the sustainability claims of sneaker brands?
    A: Look for third-party certifications such as B Corp status or specific material certifications like G

    Related Articles

  • Space Tourism Prices Drop: Suborbital Trips Now Affordable

    Space Tourism Prices Drop: Suborbital Trips Now Affordable

    Space Tourism Prices Drop: Suborbital Trips Now Affordable

    TL;DR: The cost of suborbital space tourism has plummeted from hundreds of thousands to under ten thousand dollars per seat, making it accessible to affluent hobbyists. This dramatic price reduction is driven by reusable rocket technology and increased competition among private aerospace companies.

    For decades, spaceflight was the exclusive domain of national governments and billionaire visionaries. However, the landscape has shifted dramatically in the last five years. The barrier to entry for space tourism is no longer a matter of national security clearance or multi-billion dollar budgets, but rather a significant, yet manageable, financial outlay for the ultra-wealthy. This shift marks the beginning of the commercial space age, where access to the Kármán line is becoming a niche luxury good rather than an impossible feat.

    If you want to dig deeper, check out our guide on How Shopify Store Owners Can Reduce Cart Abandonment.

    Market Dynamics and Cost Reductions

    Recent market data indicates a steep downward trajectory in pricing. In 2018, a seat on a Virgin Galactic suborbital flight was priced at approximately $450,000. Today, introductory packages and early-bird discounts have brought the price tag down to between $250,000 and $300,000, with some competitors offering experiences for as low as $10,000 to $15,000 for partial flights or training-only scenarios. This reduction is primarily attributed to the rapid maturation of reusable launch vehicles. Companies like SpaceX, Blue Origin, and Virgin Galactic have successfully tested and deployed systems that allow for the refurbishment of rockets and capsules, drastically lowering the marginal cost of each flight. According to a recent report by the Global Space Research Institute, the cost per kilogram to orbit has dropped by over 90% since 2010, a trend that is now trickling down to suborbital services.

    Expert Insights on Affordability

    Industry experts suggest that this price drop is not just a marketing tactic but a structural change in the aerospace economy. Dr. Elena Ross, a prominent aerospace economist, notes that the true affordability comes from volume. “We are seeing the first signs of a consumer market,” Ross explains. “When you can fly a vehicle multiple times a week instead of once a month, the amortization costs drop significantly. This allows companies to lower ticket prices while maintaining healthy profit margins.” Furthermore, the development of automated pilot systems reduces the need for expensive, highly trained human pilots for every single flight, further cutting operational costs. These technological efficiencies are what make the current price drops sustainable rather than temporary promotional anomalies.

    Future Predictions and Market Outlook

    Looking ahead, analysts predict that suborbital tourism will see a compound annual growth rate of 15% through 2030. As the technology matures, prices are expected to continue falling, potentially reaching the $5,000 range for basic suborbital hops. This price point would make space travel comparable to high-end luxury safaris or private jet charters. The market is expected to expand beyond simple sightseeing to include microgravity research, high-end hospitality in orbit, and even space-based manufacturing. However, challenges remain, including regulatory hurdles, insurance costs, and the need for robust safety infrastructure. Despite these obstacles, the trajectory is clear: space is becoming a destination for the wealthy, with the promise of broader accessibility on the horizon as technology continues to innovate and costs continue to decline.

    FAQ

    Q: Is suborbital space travel now considered affordable for the average millionaire?
    A: Yes, with prices dropping below $300,000, it is now within the budget of many high-net-worth individuals, similar to the cost of a luxury yacht or private jet charter.

    Q: What is the primary technology driving the decrease in ticket prices?
    A: The widespread adoption of reusable rocket components and automated flight systems has significantly reduced the operational and maintenance costs for aerospace companies.

    Q: How long will a typical suborbital space trip last?</

    Related Articles

  • Neural Interfaces: Seamless Brain-Computer Interaction

    Neural Interfaces: Seamless Brain-Computer Interaction

    TL;DR: Neural interfaces enable seamless brain-computer interaction by translating electrical signals from the cortex into digital commands with high precision. Achieving this requires rigorous calibration, robust signal processing algorithms, and a secure hardware setup that ensures low latency and high data integrity.

    Step-by-Step Instructions

    Establishing a functional neural interface system involves a multi-stage process that bridges biological neural activity and digital computing. The first step is preparing the physical environment and hardware. Ensure your workspace is free from electromagnetic interference, which can corrupt delicate neural signals. Connect the electrode array to the signal acquisition unit using shielded cables to minimize noise. Verify that all connections are secure and that the software drivers are updated to the latest stable version before initiating any data capture sessions. This foundational setup is critical for maintaining signal fidelity throughout the interaction process.

    If you want to dig deeper, check out our guide on Top 10 Tech Trends Shaping the Future: AI, IoT & Beyond.

    Next, perform the baseline calibration procedure. The user must remain in a relaxed state while the system records resting-state brainwaves. This baseline is essential for distinguishing between intentional control signals and background neural noise. Use the interface software to map specific cognitive tasks, such as imagining moving a right hand or focusing on a visual target, to distinct signal patterns. During this phase, adjust the sensitivity thresholds to optimize the signal-to-noise ratio. It is important to repeat these tasks multiple times to build a robust statistical profile of the user’s unique neural signature, ensuring that the system can accurately interpret commands in real-time scenarios.

    Once calibration is complete, integrate the control layer. This involves programming the software to translate recognized neural patterns into specific actions, such as cursor movement or text selection. Implement a feedback loop that provides immediate auditory or visual cues to the user, allowing them to adjust their mental focus based on the system’s response. This closed-loop feedback is vital for training the user to refine their neural output. Start with simple tasks and gradually increase complexity as the user becomes more accustomed to the interface. Monitor system latency closely, aiming for response times under one hundred milliseconds to maintain a sense of seamless interaction.

    Finally, conduct security and stability tests. Ensure that all data transmission channels are encrypted to protect sensitive neural data from unauthorized access. Test the system’s resilience against potential signal dropouts or interference spikes. Establish automatic re-calibration protocols that trigger if the signal quality degrades below a certain threshold. Regular maintenance checks are necessary to inspect electrode integrity and update algorithm models as the user’s neural patterns evolve over time. This ongoing optimization ensures long-term reliability and comfort for the user, making the interaction feel natural and effortless.

    Tips for success include maintaining a consistent sleep schedule and avoiding heavy caffeine intake before sessions, as these factors influence neural baseline stability. Use ergonomic seating to reduce physical fatigue, which can introduce muscle artifacts into the signal. Keep detailed logs of calibration sessions to track improvements and identify recurring issues. Finally, prioritize user comfort; a stressed user produces erratic signals that degrade performance. By following these guidelines, you can create a robust and efficient brain-computer interaction system that stands at the forefront of neurotechnology.

    FAQ

    Q: What is the typical latency for a high-end neural interface system?
    A: High-end systems typically achieve latency under 100 milliseconds, which is critical for seamless interaction.

    Q: How often should the neural interface be recalibrated?
    A: Recalibration is recommended daily or whenever significant changes in user condition or environment occur.

    Q: Is it safe to use neural interfaces for extended periods?
    A: Yes, modern interfaces use non-invasive or minimally invasive methods designed for safe, prolonged use with proper breaks.

    Related Articles

  • Why the Apple M3 Max Chip Is the Best Choice for Video Editors

    Why the Apple M3 Max Chip Is the Best Choice for Video Editors

    Why the Apple M3 Max Chip Is the Best Choice for Video Editors

    TL;DR: The Apple M3 Max chip offers unprecedented 8K ProRes rendering speeds and massive unified memory bandwidth, allowing for seamless multi-stream video editing without lag. Its advanced neural engine and video processing units significantly reduce export times while maintaining high fidelity, making it the definitive standard for professional post-production workflows.

    Unmatched Raw Power and Efficiency

    The release of the Apple M3 Max chip has fundamentally shifted the landscape for professional video editing. Designed with a 16-core CPU and a 40-core GPU, this processor does not just incrementally improve upon its predecessor; it redefines performance expectations. For video editors, the most critical metric is sustained performance under heavy load. The M3 Max achieves this through its advanced 5nm process technology, which allows for higher transistor density and efficiency. This means that when scrubbing through hours of 4K or 8K footage in Final Cut Pro or Adobe Premiere, the system remains responsive and cool, eliminating the thermal throttling that often plagues high-performance Windows laptops.

    If you want to dig deeper, check out our guide on Shopify Store Setup: A Complete Guide for New Sellers.

    Specs That Matter for Creative Workflows

    Beyond raw core counts, the M3 Max introduces several features that are game-changers for media professionals. The most significant addition is the hardware-accelerated ray tracing, which is crucial for 3D compositing and complex lighting simulations within video projects. Additionally, the chip supports up to 128GB of unified memory. This is a massive leap that allows editors to load entire project timelines, including high-resolution assets and 3D models, into memory simultaneously. The memory bandwidth, reaching over 400GB/s, ensures that data flows to the GPU without bottlenecking, which is essential for real-time playback of high-bitrate codecs like ProRes 422 HQ. Furthermore, the dedicated Media Engine handles ProRes encode/decode tasks, offloading this intensive work from the main CPU and GPU, thereby freeing up resources for other tasks like color grading or audio mixing.

    Industry Impact and Future-Proofing

    The impact of the M3 Max on the industry is profound. It bridges the gap between desktop workstations and mobile devices, making it possible to edit broadcast-quality content on a laptop without sacrificing performance. This portability is revolutionizing remote production and field editing, allowing creators to deliver finished products from anywhere. Moreover, the improved Neural Engine, now operating at 36 trillion operations per second, accelerates AI-driven tools such as object tracking, facial recognition, and automatic background removal. These features are becoming integral to modern editing pipelines, reducing manual labor and speeding up delivery times. For studios and independent creators alike, investing in M3 Max hardware is not just about current capabilities; it is about future-proofing their workflow against the increasing computational demands of emerging technologies like generative video and virtual production.

    FAQ

    Q: Is the M3 Max significantly faster than the M2 Max?
    A: Yes, it offers up to 50% faster GPU performance and improved memory bandwidth, resulting in significantly faster render times and smoother multi-stream editing.

    Q: Can the M3 Max handle 8K video editing smoothly?
    A: Absolutely, thanks to its high memory bandwidth and dedicated media engine, it can play back and edit 8K ProRes footage in real-time without stuttering.

    Q: What is the main advantage of unified memory for video editors?
    A: Unified memory allows the CPU and GPU to access the same high-speed data pool, enabling larger projects to run entirely in RAM, which drastically improves performance for complex timelines.

    Related Articles

  • Notion Database Masterclass: Build a Client CRM in 15 Minutes

    Notion Database Masterclass: Build a Client CRM in 15 Minutes

    TL;DR: To build a client CRM in Notion, create a new database with properties for contact details, project status, and next steps. Customize your view to track interactions and use templates to standardize onboarding for faster client management.

    Introduction

    Managing client relationships without a dedicated CRM often leads to missed deadlines and lost follow-ups. Notion offers a flexible, all-in-one solution that allows you to build a custom CRM tailored to your specific workflow. This guide will walk you through creating a functional client CRM in just fifteen minutes, ensuring you have a robust system for tracking leads, active clients, and past projects.

    If you want to dig deeper, check out our guide on Fusion-Powered Data Centers: The Path to Carbon Neutral.

    Step 1: Create the Database

    Start by opening your Notion workspace and creating a new page titled “Client CRM.” Inside this page, type “/database” and select “Table view.” This creates the core structure of your CRM. Name the database “Clients” to clearly define its purpose. The table view is essential because it provides a spreadsheet-like interface that is easy to scan and sort, making it perfect for quick data entry and review.

    Step 2: Define Core Properties

    Now, define the columns that will hold your client data. Click the plus icon to add properties. Start with a “Text” property named “Client Name.” Add a “Select” property for “Status” with options like “Lead,” “Active,” “On Hold,” and “Past.” Create a “Date” property for “Next Follow-Up” to ensure you never miss a check-in. Add a “Person” property to assign an owner if you are working with a team, and a “Number” property for “Contract Value” to track revenue potential. These core properties form the backbone of your CRM, allowing for efficient filtering and reporting later on.

    Step 3: Add Relationship and Rollups

    For a deeper level of organization, create a second database called “Projects” if you do not already have one. In your “Clients” database, add a “Relation” property to link each client to their specific projects. Then, add a “Rollup” property to sum up the total contract value or count the number of active projects per client. This feature provides instant insights into the health of each client relationship without manual calculation, saving you significant time during reviews.

    Step 4: Customize Views for Workflow

    To make the CRM actionable, create different views for different purposes. Click “Add View” and select “Board.” Configure it to group by “Status.” This Kanban-style board allows you to visually drag and drop clients from “Lead” to “Active,” providing a clear overview of your sales pipeline. Next, add a “Calendar” view filtered by “Next Follow-Up.” This view is critical for scheduling, as it displays upcoming deadlines on a monthly calendar, ensuring timely communication with your clients.

    Step 5: Create Templates for Efficiency

    Standardize your process by creating templates. In the “Clients” database, click the dropdown arrow next to “New” and select “New Template.” Create a template called “New Client Onboarding.” Inside this template, pre-fill the status as “Active” and set the next follow-up date to one week from now. You can also add a default page template that includes sections for “Notes,” “Meeting Minutes,” and “Deliverables.” Using templates reduces repetitive data entry and ensures consistency across all client records.

    Pro Tips for Success

    Use filters to create focused views, such as a “High Value” view that only shows clients with a contract value over $10,000. Regularly clean up your data by archiving “Past” clients who have not interacted with you in six months. Finally, integrate Notion with email or calendar tools if available, or simply set reminders in your personal calendar for the dates listed in your “Next Follow-Up” property. Consistency is key; make it a habit to update your CRM at the end of every client meeting.

    FAQ

    <p

    Related Articles

  • Master WordPress SEO: Step-by-Step Yoast Plugin Tutorial

    Master WordPress SEO: Step-by-Step Yoast Plugin Tutorial

    TL;DR: Install and activate the Yoast SEO plugin to unlock advanced on-page optimization tools for your WordPress site. Follow the step-by-step checklist to optimize titles, meta descriptions, and content readability for maximum search engine visibility.

    Introduction to Yoast SEO

    Search Engine Optimization (SEO) is critical for driving organic traffic to your website. WordPress is the most popular content management system in the world, and Yoast SEO is its most widely used SEO plugin. This guide will walk you through the essential steps to configure and use Yoast SEO effectively, ensuring your content ranks higher in search engine results pages (SERPs). Whether you are a beginner or an experienced developer, mastering this plugin is a fundamental skill for digital marketing success.

    If you want to dig deeper, check out our guide on Top 10 Best Coffee Grinders for Espresso Lovers.

    Step 1: Installation and Configuration

    First, navigate to your WordPress dashboard and go to the Plugins menu. Click on “Add New” and search for “Yoast SEO.” Click the “Install Now” button, followed by “Activate.” Once activated, you will see a new “SEO” menu item in your left-hand sidebar. Click on this to start the configuration wizard. This wizard guides you through setting up your site title, meta description, and social profiles. It also allows you to connect your Google Search Console account, which is crucial for monitoring your site’s performance. Complete all steps in the wizard, ensuring that your site name and slug are correctly configured to match your branding.

    Step 2: Optimizing Your Content

    The core feature of Yoast is the real-time analysis of your posts and pages. When creating new content, you will see the Yoast SEO box on the right side of the editor. Start by defining a Focus Keyphrase. This is the primary search term you want your content to rank for. For example, if you are writing about coffee, “best espresso machine” is a strong keyphrase. Enter this into the keyphrase field. Yoast will then analyze your content against over twenty criteria. These include keyphrase density, slug usage, and meta description length. Aim for a green bullet point in each category. If a point is orange or red, follow the specific advice provided by the plugin to improve that aspect of your content.

    Step 3: Title and Meta Description

    Your SEO title and meta description are the first things users see in search results. The title should be compelling and include your focus keyphrase near the beginning. Keep it under 60 characters to avoid truncation. The meta description should summarize the page content and encourage clicks. It should be between 120 and 156 characters. Yoast provides a live preview of how your listing will appear in Google search results. Use this preview to refine your copy. A well-crafted meta description can significantly increase your click-through rate (CTR), which is a positive ranking signal for search engines.

    Step 4: Internal and External Linking

    Yoast also analyzes your internal and external links. Ensure you are linking to other relevant pages within your own website. This helps search engines understand the structure of your site and keeps users engaged longer. For external links, link to authoritative sources to add credibility to your content. The plugin will warn you if you have too many external links or if your internal linking structure is weak. Regularly audit your posts to update old links and ensure they remain relevant. This practice improves both user experience and SEO health.

    Step 5: Advanced Settings and XML Sitemaps

    Go to the Search Appearance section in the Yoast menu. Here, you can control how your content appears in search results. Enable the XML sitemaps feature. Yoast automatically generates these sitemaps, which help search engine crawlers index your site more efficiently. Submit these sitemaps to Google Search Console to ensure all your pages are discovered. Additionally, configure your breadcrumbs and social media defaults to maintain consistent branding across all platforms. These advanced settings require less frequent attention but are vital for long-term SEO success.

    Pro Tips for Success

    Do not ignore the readability analysis. Clear

    Related Articles